Migrating from API Keys
As of March 31, 2023, 7shifts no longer supports API key authentication to access API resources and have reached be End of Life (EOL). Access to view already generated API keys or create new ones will no longer be permissible. Please read this guide to understand the impact of the changes and how to migrate to a supported authentication method.
Changes April 1, 2023
Any API request using API key authentication will fail and return a 401 Unauthorized response.
Why are API keys no longer supported?
API keys are no longer supported to increase security and add additional functionality to our API resources. At a high level, these are the limitations being addressed:
- Security - API keys had admin privileges and could not be changed or deleted. Attempting to prevent their use after they are issued is very difficult and can interrupt additional integrations.
- Single use cases - API keys have to be shared as only one can be created per company. It is difficult to determine who is using them for authentication or distribute them for different uses.
- Lack of scoping - API keys had admin privileges and could not be restricted to certain resources or actions.
- V2 endpoint access - API keys don't have access to V2 endpoints.
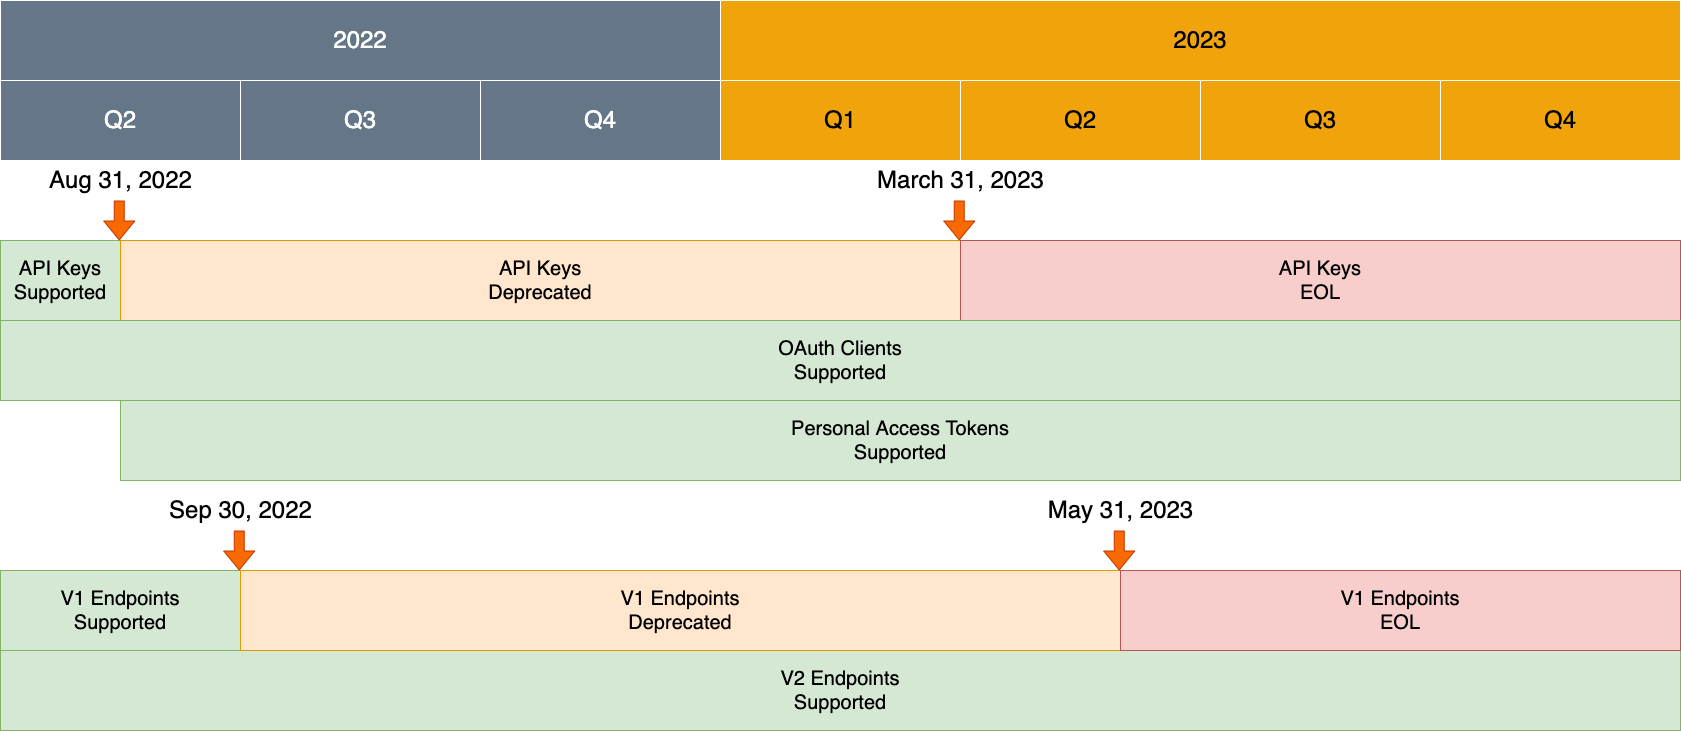
Important Dates Timeline
- 2023-03-31 API keys are EOL and no longer supported
- 2023-05-31 API V1 endpoints are EOL and no longer supported

Supported Authentication Methods
If you are using 7shifts API resources for internal usage and are not looking to be a technology partner of 7shifts, you should migrate to access tokens for authentication.
All partners using 7shifts API resources should migrate to OAuth Clients for authentication.
NOTE: If you integrate with a large number of 7shifts companies, it may be beneficial to use an OAuth client for authentication. OAuth clients provide the ability to automate adding new locations with minimal user input and can speed up the process.
Access Tokens
You can create an Access Token for authentication with our API's. Access Tokens have the following benefits:
- You can create multiple tokens per company. You can name access tokens to describe their use and prevent the need to share tokens for different applications or use cases. For example you can create separate tokens for your development and production environments.
- Tokens must be assigned an active administrator within a company. This can help you identify the primary contact responsible for the access token. Additionally, for notification of important information regarding the APIs, 7shifts will contact the assigned administrator.
- Tokens can be edited and deleted. When you no longer need a token or if you wish to revoke access to an application that is using a token, you can delete it for increased security. You can also change the administrator assigned to them.
How to create an Access Token
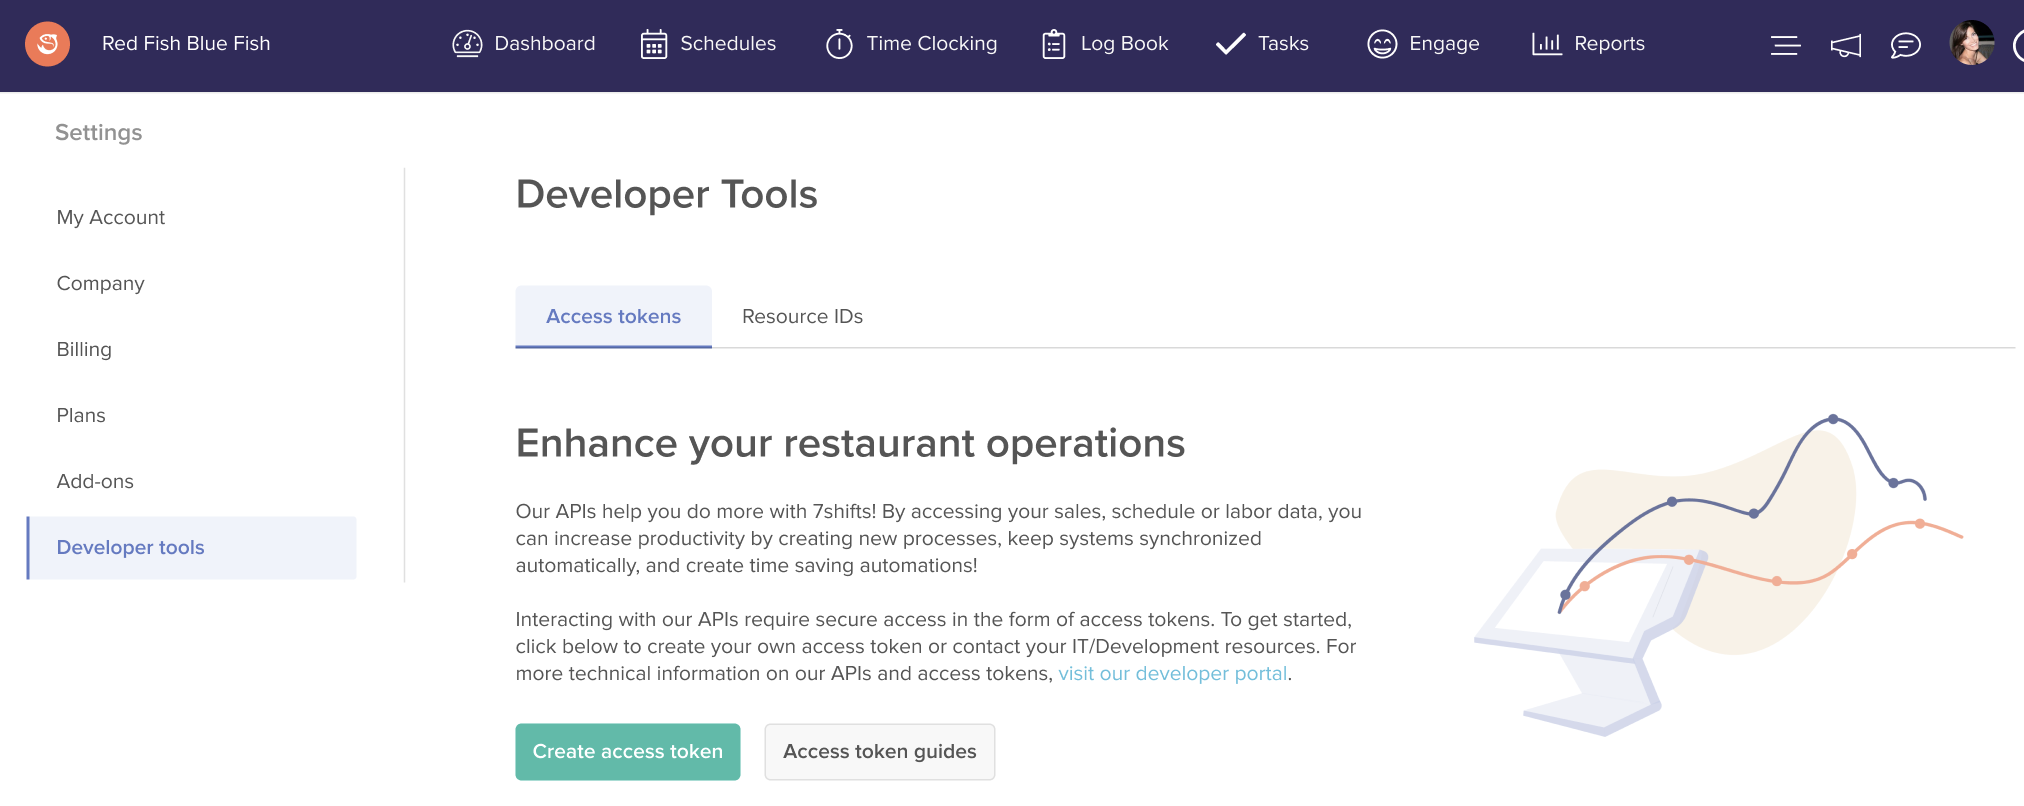
- As an Admin, sign into your 7shifts account and click on your Profile picture. Select Company Settings and click on the Developer Tools side menu.
- Once on the Developer Tools menu, click on Access tokens tab.

- Click on Create access token.
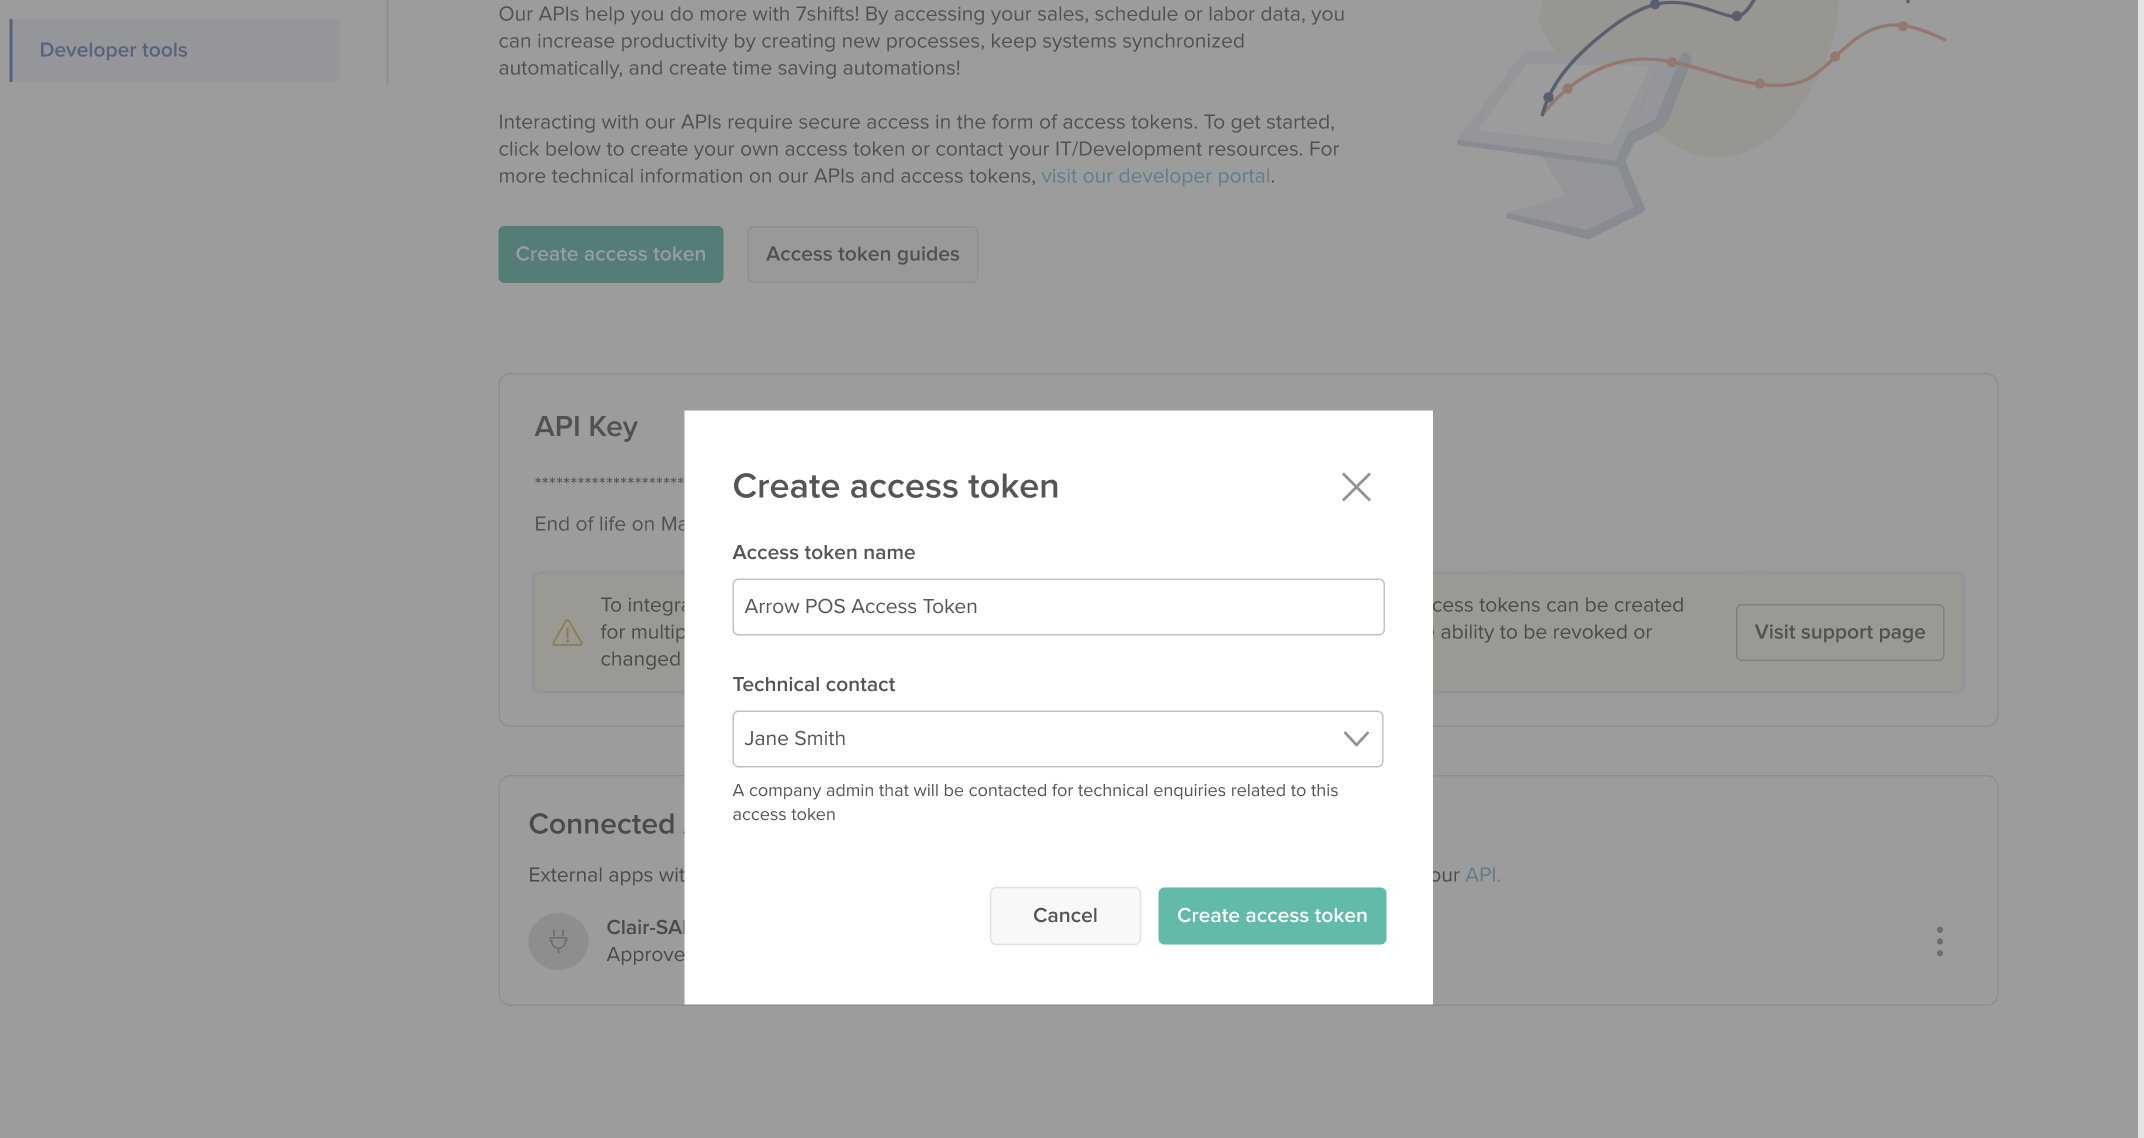
- Give the token a name. Examples are: the application/integration name, the environment it is for or the automation using it. Assign a technical contact, they must be an active administrator. Click Create access token.

- Copy this newly generated access token by clicking the copy icon on the left of the access token.

- To use your token, use the bearer authentication scheme. Send the token in the
Authorizationheader when making requests as per the example below.
curl --request GET --url 'https://api.7shifts.com/v2/whoami' \
--header 'Authorization: Bearer {ACCESS_TOKEN}'
More details on Access Tokens can be found in our Authentication section of our API Reference.
OAuth Clients
All 7shifts partners must authenticate using the OAuth 2.0 flow to use 7shifts API endpoints. To create a new OAuth Client, please reach out to [email protected] to start the setup process.
To expedite the OAuth client creation process, please have the following information ready:
- Technical email contact. Should be a valid email address not tied to a user.
- First & last name of the primary technical contact.
- The official name for your company. Used during authorization process.
- A PNG image of your company logo. Used during the authorization process.
- A callback URL. Used to receive the company GUID after authorization granted.
More details on OAuth clients can be found in our OAuth Authentication guide.
Migrating API keys to OAuth Clients
When you have acquired an OAuth client, we can assist the migration from API keys by swapping the API keys you currently use for authorization grants (GUIDs). By performing the API key-to-GUID exchange, company admins will not be required to go through any of the OAuth Grant flow steps.
Contact [email protected] when you are ready to begin the migration from API keys to OAuth client.
Updated 9 months ago
